Here's what to expect
More secure ways to verify your internet banking login
We're introducing new ways to verify it's you when you log in to internet banking. These changes help protect your banking and give you more ways to securely access your accounts.
What you'll notice
When you log in, you may see new options to verify it's you:
- Approve your login with an app notification.
- Enter a one-time code sent to your mobile.
Over time, these options will become the main way to verify your login, as they offer a more secure way to confirm it’s you. See how it works.
Get set up
To use app notifications and one-time codes:
- Download or update the Kiwibank mobile app.
- Make sure your mobile number is up to date and verified.
If you don’t use the app or don’t have a mobile number, you’ll still be able to log in using other methods for now.
A new online banking experience for business
Some business customers will see updates to their online banking experience. These changes are being rolled out gradually, so you may not see them straight away.

What you'll notice when you log in
- Accounts over view has changed. View accounts in list or grid views, and find upcoming payments under 'Pay & transfer.
- Access statements from the accounts overview or settings.
- Check your export settings. You may need to select a different format or update your import mapping.
- Your profile switcher now sits in the top right of the navigation bar.
See what's changing for business banking.
Web addresses may look different
During the rollout, you may notice the web address (URL) change when:
- you log in to internet banking, or
- you move between different parts of internet banking.
This is expected and your banking is secure.
How to tell you’re on a genuine Kiwibank or NZHL page:
- Genuine Kiwibank web addresses will always include "kiwibank.co.nz".
- Genuine NZHL web addresses will always include "nzhltransact.co.nz".
For security, please log in to internet banking through the Kiwibank website.
As the rollout continues
We’re rolling out updates gradually, so you may see the refreshed experience in some areas, like accounts, while other parts of internet banking will stay the same for now.
Some users, such as data users with limited access, may not see these changes. Experiences can vary across users within the same business.
Thanks for your patience while we make these improvements. If you have any questions, please read our guide below.
Help & how-to guides
You can try these new ways to verify it's you the next time you log in to internet banking.
- Log in to internet banking
- Enter your access number and password, then click ‘Log in’
- On the verification screen, click ‘Choose another way to verify’ (if you see this option.)
- Choose how you’d like to verify your login:
- Click ‘Send an app notification’ to approve your login in the Kiwibank app.
- Click ‘SMS one-time code’ to receive a code to your mobile.
- Follow the prompts to confirm it’s you.
Only approve a login or enter a code if you're the one logging in. If you receive a notification you weren’t expecting, decline it.
Find out more about app notifications and SMS one-time codes.
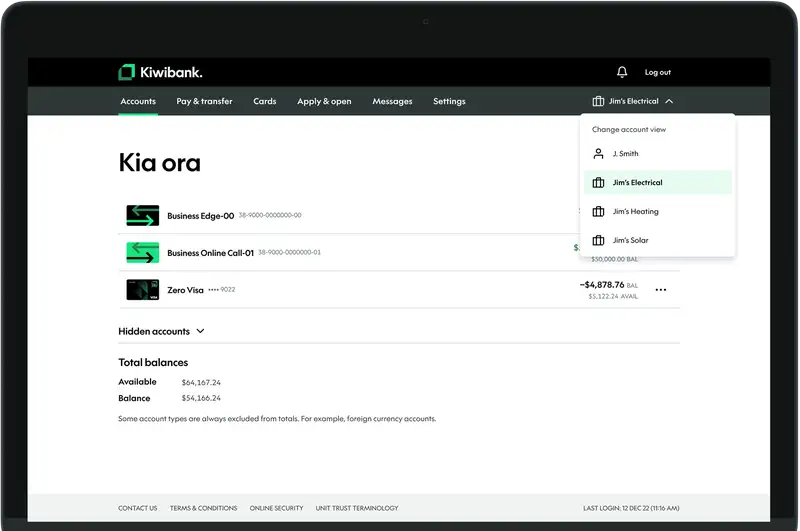
You’ll see a new way to move between profiles.
- Log in to internet banking or the mobile app.
- You'll find the profile switcher in the top right of the navigation menu.
- Click on the drop-down arrow to view your profiles and select the one you want to view.
Reorder your profiles so it’s quicker to access the ones you use most.
- Log in to internet banking.
- Go to ‘Settings’.
- Select ‘Reorder profiles’.
- Use the arrows on the right side to move your profiles up or down.
- Select 'Save changes'.
The profile at the top of the list becomes your default and is what you’ll see each time you log in.
See step by step instructions for switching between profiles.
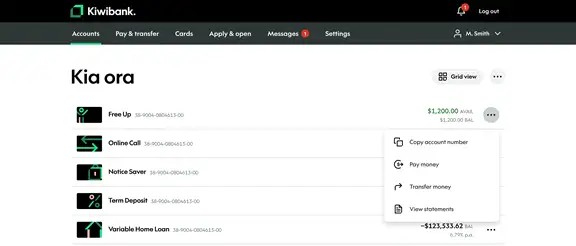
If you have access to statements, you can download them from ‘Statement vault’ under 'Settings', or from the accounts overview.
From accounts overview:
- Log in to internet banking.
- From the Accounts overview, identify the account you'd like to see statements for and click the icon with the three dots at the bottom right of the box.
- Follow the prompts to see and download your statements.
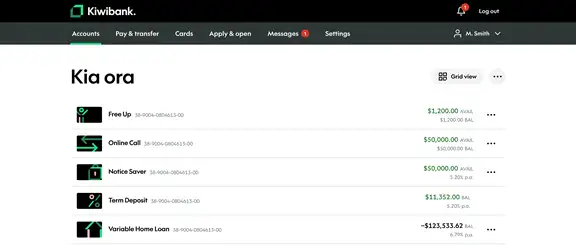
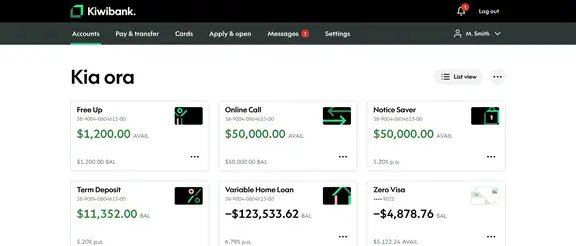
You can choose how you view yours accounts, as a list or a grid.
- Log in to internet banking.
- From the Accounts overview click the 'List' or 'Grid' icon in the top right corner of the screen to change how your accounts appear.
List view
Grid view
- Log in to internet banking.
- From the Accounts overview click one of your accounts and you'll be taken to recent transaction history for this account.
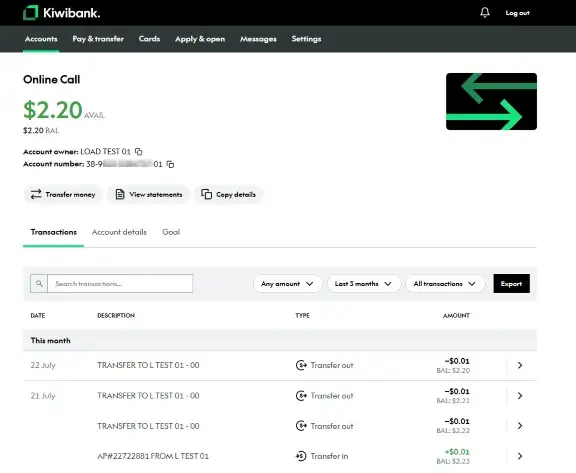
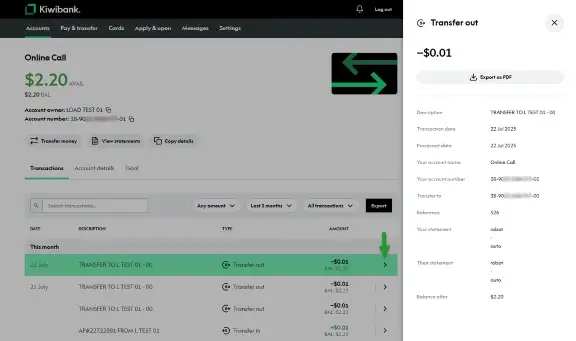
- Log in to internet banking.
- From the Accounts overview click one of your accounts and you'll be taken to a recent transaction history for this account.
- To see the details of a single transaction, click on that transaction and the details will display on the side.
- Click 'Export to PDF' to download.
- Log in to internet banking.
- From the Accounts overview click one of your accounts and you'll be taken to recent transaction history for this account.
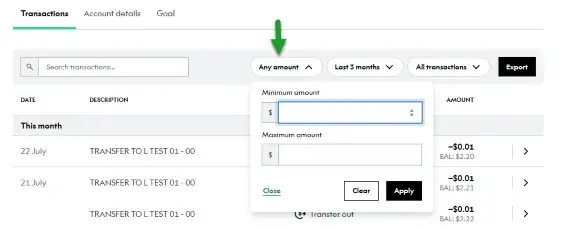
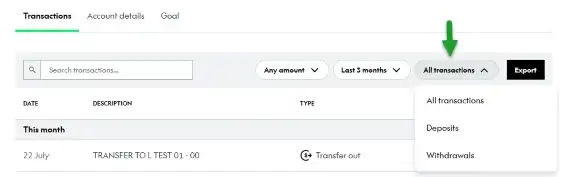
- Use the Search transactions box or any of the filter icons (Any amount, Any date, All transactions) to find specific transactions.
Filter your transactions by amount
Filter your transactions by date

Filter your transactions by type
- Log in to internet banking.
- From the Accounts overview click on one of your accounts and you'll be taken to a recent transaction history for this account.
- Click the Export icon and select the file format you'd like your transactions to be exported in (CSV, JSON, OFX, QIF, PDF).
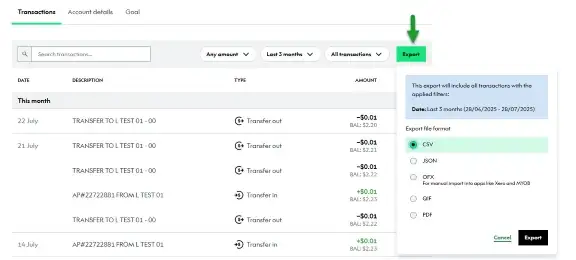
See step by step instructions for exporting your transactions.
- Log in to internet banking.
- From the accounts overview click one of your accounts and you'll be taken to an overview of the transactions for this account.
- Use the filters to select which transactions you'd like to export. For example, you can choose a longer date range.
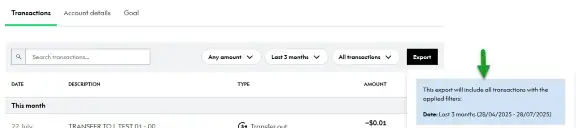
The export will include all transactions with the applied filters for the selected date range. Exports are limited to two years. To view older transactions, use your statement vault.
The notes feature is no longer available in internet banking. You can still read notes you've saved before, but you won't be able to edit them or create new ones.
How to access your read-only notes
- Log in to internet banking.
- Go to Settings at the top of the screen.
- Under Personal settings and details select My notes to see previously saved notes.
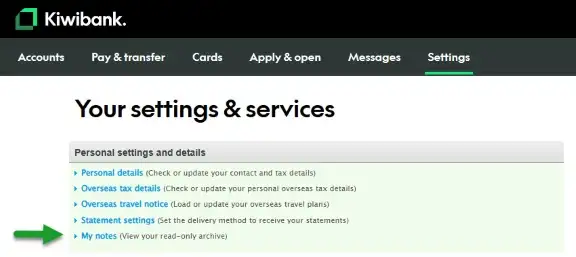
We recommend making a copy of your notes if you rely on these.
Our Goal Tracker tool is currently unavailable in internet banking while we work on updates, but you can still use it in our mobile app.